This tutorial will show you how to position HTML elements on a web page using the css absolute positioning property.
The css absolute positioning property allows you to place an HTML element in a particular place in a web page.
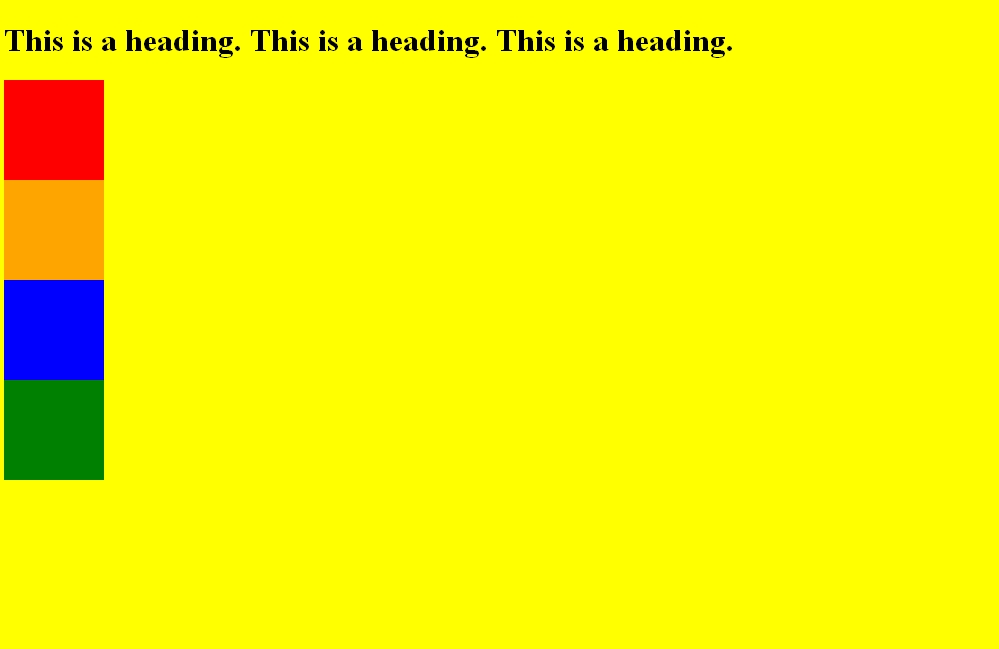
The code below will display the HTML elements in a web page just as they appear in the document, one after the other. The reason is that HTML elements are positioned statically by default.
<!DOCTYPE html PUBLIC "-//W3C//DTD XHTML 1.0 Strict//EN" "http://www.w3.org/TR/xhtml1/DTD/xhtml1-strict.dtd">
<html xmlns="http://www.w3.org/1999/xhtml" xml:lang="en" lang="en">
<head>
<title>Web Development Tutorials.com</title>
<style type="text/css">
body
{
background: yellow;
}
div
{
width: 100px;
height: 100px;
}
div#one
{
background: red;
}
div#two
{
background: orange;
}
div#three
{
background: blue;
}
div#four
{
background: green;
}
</style>
</head>
<body>
<h1>
This is a heading. This is a heading. This is a heading.
</h1>
<div id="one"></div>
<div id="two"></div>
<div id="three"></div>
<div id="four"></div>
</body>
</html>
The code above creates the following web page:
CSS Positioning Tutorial Working Example
The image below is an example of the web page that the code above creates:
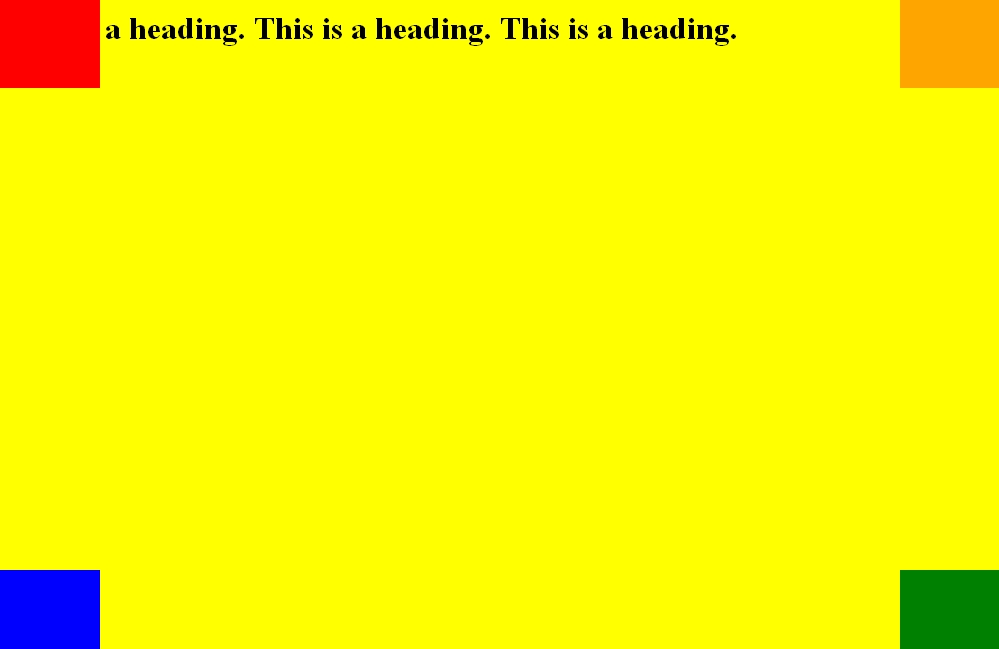
The declaration position: absolute; causes the HTML element to leave the normal flow of the document and allows you to position it anywhere on the web page using top or bottom and left or right.
The code below will display the HTML elements in specific areas of the web page.
<!DOCTYPE html PUBLIC "-//W3C//DTD XHTML 1.0 Strict//EN" "http://www.w3.org/TR/xhtml1/DTD/xhtml1-strict.dtd">
<html xmlns="http://www.w3.org/1999/xhtml" xml:lang="en" lang="en">
<head>
<title>Web Development Tutorials.com</title>
<style type="text/css">
body
{
background: yellow;
}
div
{
width: 100px;
height: 100px;
}
div#one
{
background: red;
position: absolute;
top: 0;
left: 0;
}
div#two
{
background: orange;
position: absolute;
top: 0;
right: 0;
}
div#three
{
background: blue;
position: absolute;
bottom: 0;
left: 0;
}
div#four
{
background: green;
position: absolute;
bottom: 0;
right: 0;
}
</style>
</head>
<body>
<h1>
This is a heading. This is a heading. This is a heading.
</h1>
<div id="one"></div>
<div id="two"></div>
<div id="three"></div>
<div id="four"></div>
</body>
</html>
The code above creates the following web page:
CSS Positioning Tutorial Working Example
The image below is an example of the web page that the code above creates:
The code below will display the HTML elements in specific areas of the web page.
<!DOCTYPE html PUBLIC "-//W3C//DTD XHTML 1.0 Strict//EN" "http://www.w3.org/TR/xhtml1/DTD/xhtml1-strict.dtd">
<html xmlns="http://www.w3.org/1999/xhtml" xml:lang="en" lang="en">
<head>
<title>Web Development Tutorials.com</title>
<style type="text/css">
body
{
background: yellow;
}
div
{
width: 100px;
height: 100px;
}
div#one
{
background: red;
position: absolute;
top: 300px;
left: 0;
}
div#two
{
background: orange;
position: absolute;
top: 300px;
right: 0;
}
div#three
{
background: blue;
position: absolute;
bottom: 0;
left: 0;
}
div#four
{
background: green;
position: absolute;
bottom: 0;
right: 0;
}
</style>
</head>
<body>
<h1>
This is a heading. This is a heading. This is a heading.
</h1>
<div id="one"></div>
<div id="two"></div>
<div id="three"></div>
<div id="four"></div>
</body>
</html>
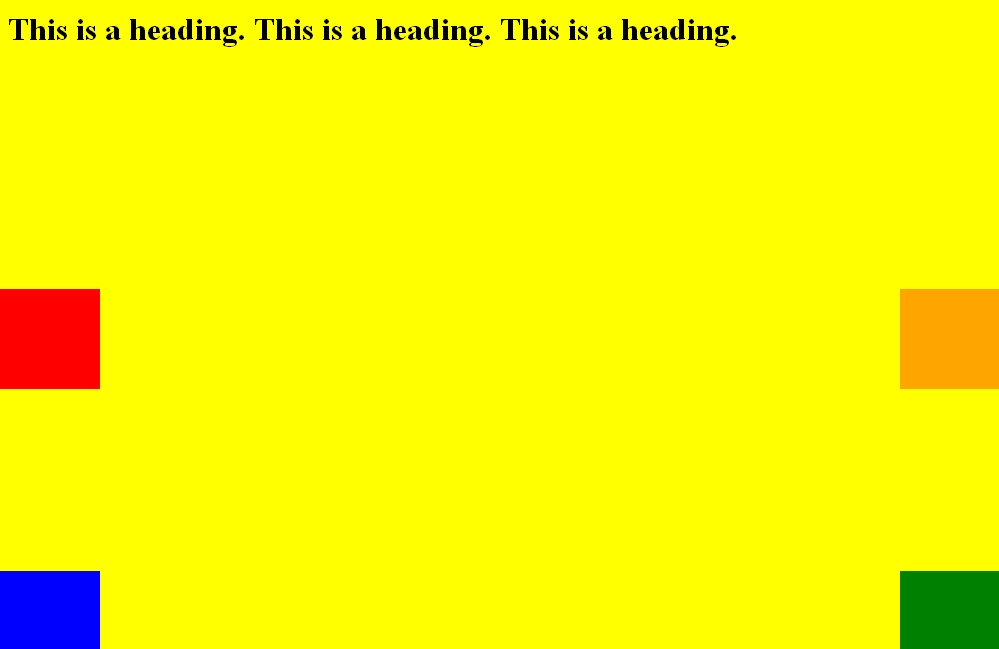
The code above creates the following web page:
CSS Positioning Tutorial Working Example
The image below is an example of the web page that the code above creates:
Use the text editor below to practice what you have learned.
